Users
To get to the user management screen select the Admin module and then Users.
Warning
The admin security group is required in order to access the users page.
User Management has multiple tabs. The first one, users contains the list of actual users, the remaining tabs can be used to group and mange the users by project, role, organisation and enterprise.
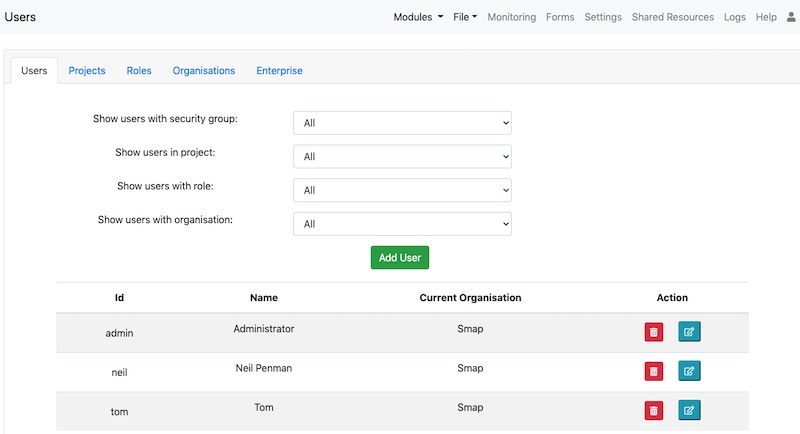
User Management
The top part of the tab has a number of filters that you can use to restrict the list of users. This can be useful if you have a lot of users. You can also use it to verify which users are assigned to a particular project or role. You can filter on:
Security group
Projects
Roles
Organisations
Add User
Click on the green Add User button to add a user.
Edit
Click on the user's name to edit their details.
User Details
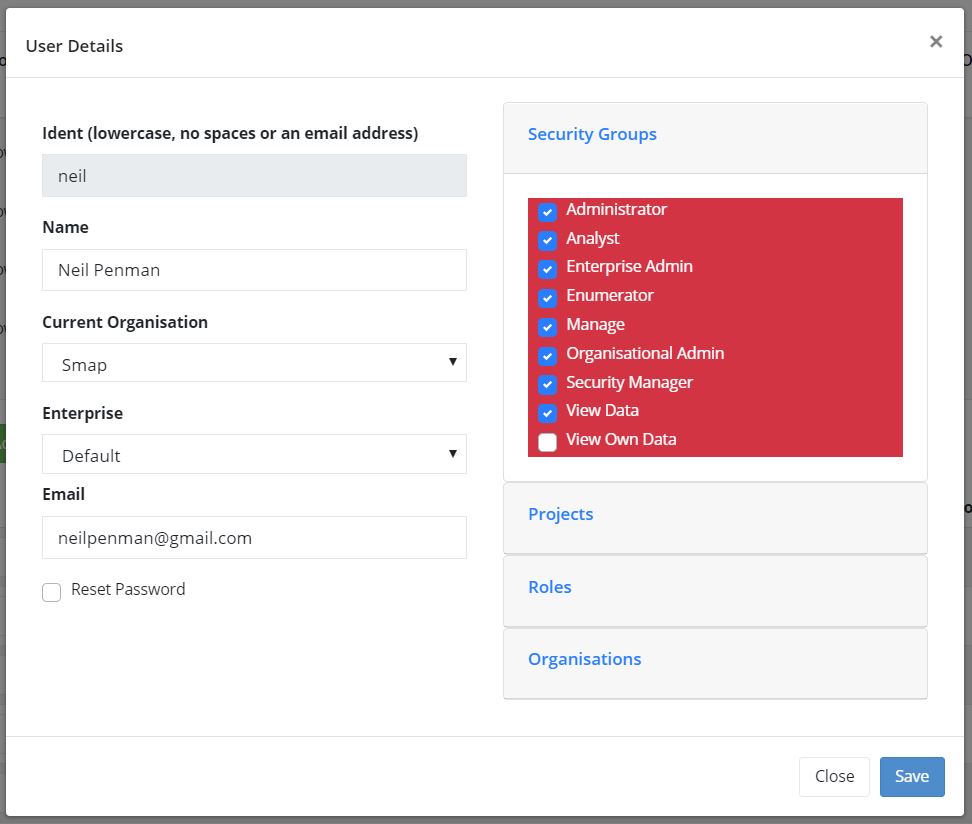
User Details
ident. This is readonly. Once a user has an ident with which they logon to the system then this cannot be changed.
Name. The user name.
Current Organisation. If you have organisation administration privilege then you can move a user to a different organisation.
Enterprise. If you have the enterprise administration privilege then you can move a user to a different enterprise.
Email. Set the users email address.
If you are editing a user then you will see a reset password checkbox that allows you to change their password.
Alternatively if you are creating a new user then you will see radio buttons and can select:
Send email to new user,
or Specify password.
If you select "send email" then the new user will get an email asking them to set their own password. You should use this option when creating analyst or admin users. If you select specify password then you can set the password for the new user. This may be appropriate if you are creating "enumerator" users.
Note
Admin and Analyst users have access to collected data and should all have their own accounts that they do not share. In addition they should specify strong passwords.
However if the user only has enumerator privilege then you may decide to allow multiple enumerators to share the same account. This may simplify administration of devices shared by multiple users.
Security Groups
Specify the security groups that they user belongs to. These include:
Administrator: Can manage users and passwords
Analyst: Can view, modify or delete collected data
Manage Console: Can assign users in the console (v25.01+)
Enterprise Admin: Can create enterprises and move between them
Enumerator: Can download surveys and submit data
Manage Data: Can access the console
Manage Tasks: Can create and manage tasks
Organisational Admin: Can create organisations and move between them
Security Manager: Can create and assign security roles
View Data. Can view data but not modify it
View Own Data. Can view their own data, that is data records that they submitted
Note
The view own data security group can currently only be used to access data using the data API (Survey Data in JSON). However if the user also has the "manage" security privilege then they can see their data in the console.
Refer to Organisational Hierarchy for an overview of how these security groups can be used to compartmentalise data.
Projects
Users will only be able to access forms that are in the projects they have been given access to. This can be used to prevent enumerators and analysts access forms that they are not working on. However users with the admin security group can always give themselves access to any project.
Roles
Assign roles to the user.
Organisation
If multiple organisations are selected then the user will be able to move between them using their profile. You can use this option to give a user the ability to change organisation even if they do not have the org admin privilege.
Managing Users in Bulk
Users can be exported to a spreadsheet and also imported from a spreadsheet.
Exporting Users
On the users page select the users tab and then the menu "File" and then "Export"

Exported User List
All the users in the organisation will be included in the exported spreadsheet along with their security groups, projects and roles. The password column will be empty, it is only used when importing a new user.
Importing Users
The exported spreadsheet above, can be used as a template to add new users. Specify:
user ident
name
email
password
security roles - specify "yes" in the security role column if you want the user to have that role
projects - Project names separated by semicolons
roles - Role names separated by semicolons
language - the users default language
Then to import the users select the menu "File" and then "Import". Select the checkbox if you want the users in the file to replace users currently on the system.
Note
Users who have been manually added will not be replaced or modified in a bulk upload. Hence you can manage bulk users by adding, modifying and deleting them but not manually added users.
Warning
When importing in bulk the password is set from the spreadsheet. Hence i would recommend against using bulk imports to create users who have analyst or admin rights. It is better to add these users manually and allow them to set their own passwords before logging on.
Managing Users FieldTask Logon tokens
Users of fieldTask can logon using a token. They can scan this token from a QR code that is displayed on the user management page. Users that have the "enumerator" security group will have a QR code button next to their name.you
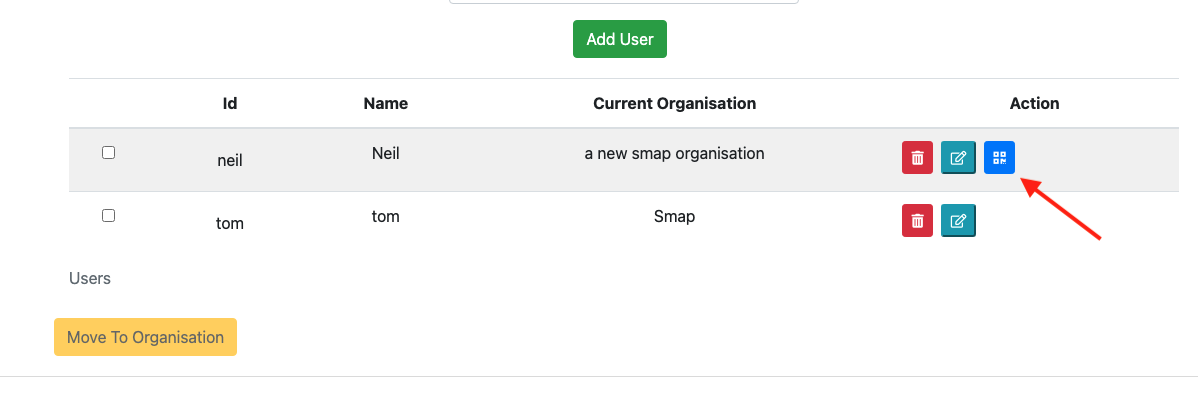
Button to show QR Code
The administrator can create, delete or refresh tokens. Deleting or refreshing a token will prevent the existing users that have the token from connecting via fieldTask and they will need to re-scan the token.
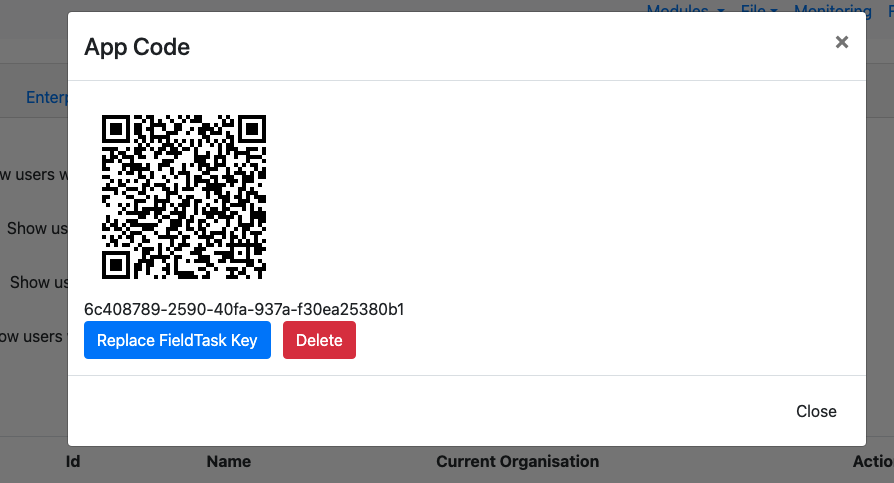
QR Code to Scan