Using FieldTask
Logging On
Logon Page
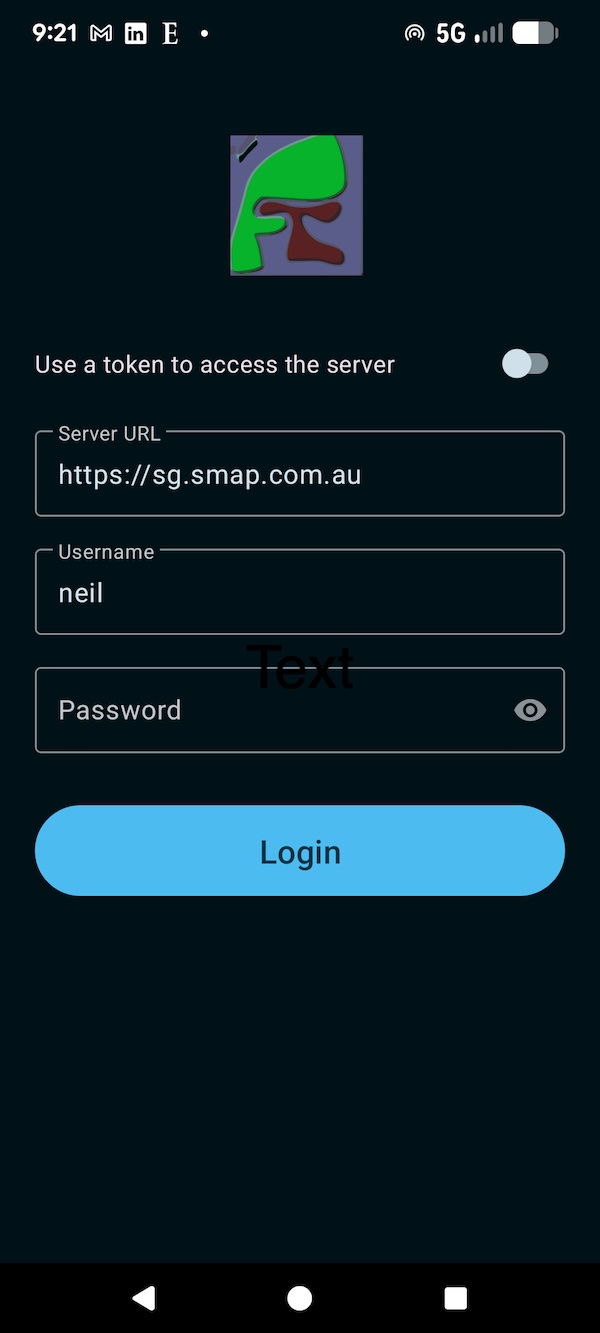
When you first start FieldTask a logon page will be shown. Your administrator can also specify on the server that every time you start FieldTask this page will be shown and you need to log on.
Login Page
You can then specify the URL of your server and enter your username and password to log on.
Note
If this is the first time you have logged on to this device then you will need to have internet connectivity so that your user identifier and password can be checked on the server. However the last 5 logons are remembered and can log on when offline.
Scanning a QR Code to log on
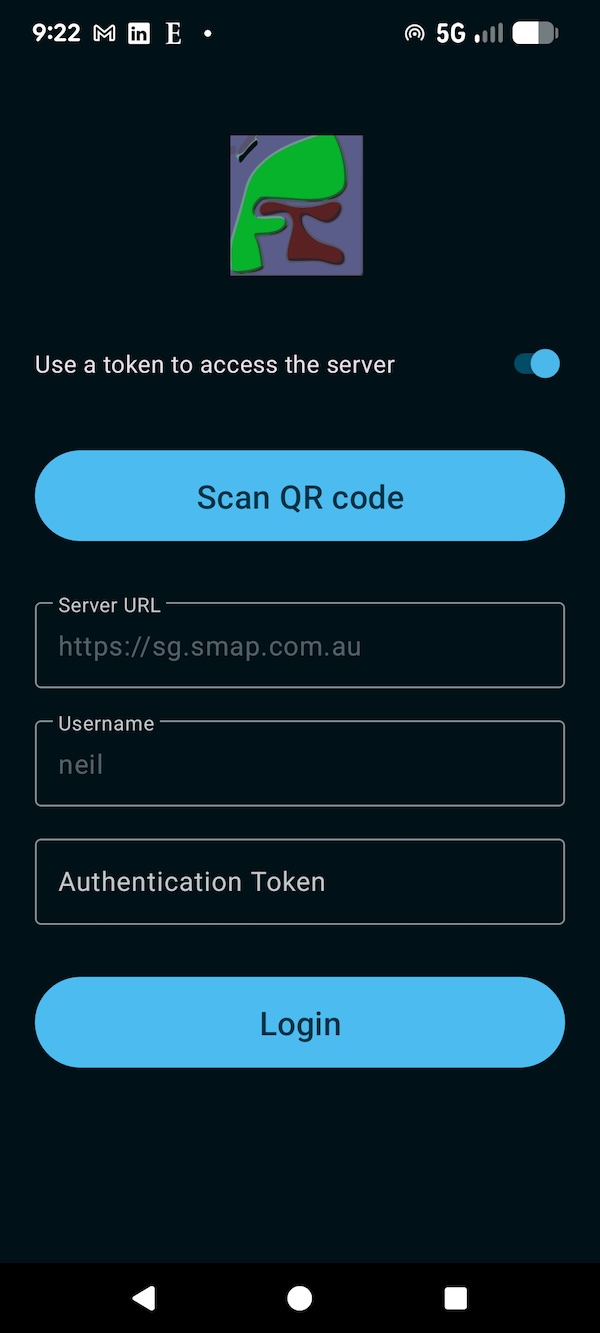
Alternatively you can select the switch labelled Use a token to access the server and then scan a QR code to log on.
Logon by scanning a QR code
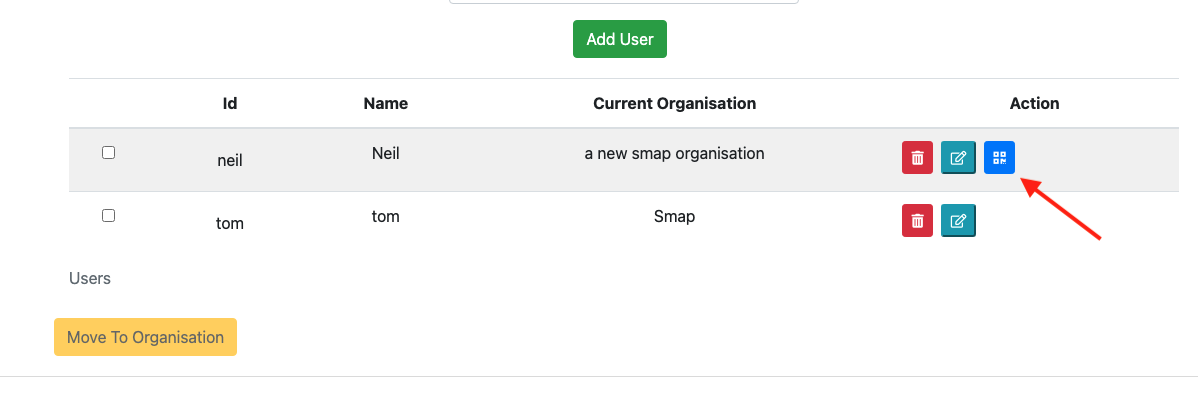
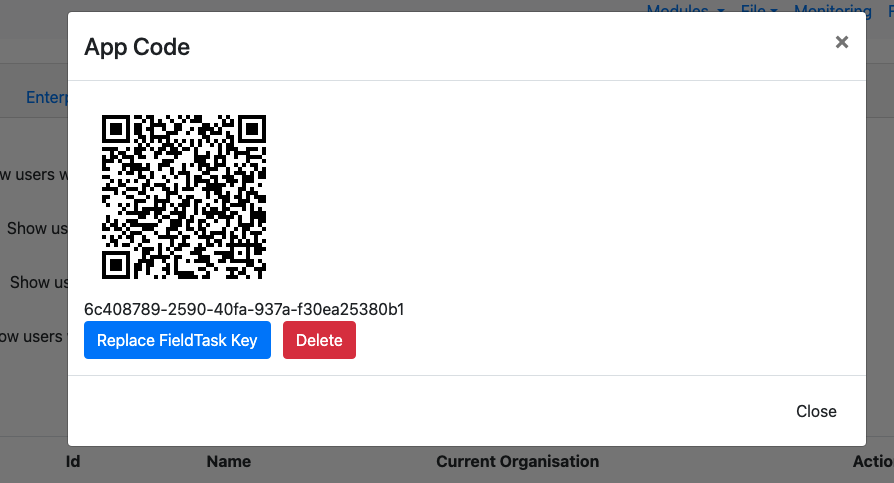
The QR code will set the username and server URL so these are read-only. You will also not need a password with this approach so that is hidden. To start scanning press the Scan QR Code button. An administrator can show the QR code on a screen by navigating to the user administration page and selecting the QR button next to the user's name. These buttons will only be shown for users that have enumerator privilege.
Button to show QR Code
QR Code to Scan
Changing logon details in settings
If you have to log on every time you open FieldTask then the logon page may be the only one where you set your logon credentials. However if that is not required then you may want to change the server, username, password or token. This can be done in settings. Select:
Menu
General settings
Server
You can then change your logon details in the same way you set them on the logon page.
Synchronising with the Server
Press Refresh on the main screen to synchronise the device with the server. In FieldTask5 you can also swipe down on the form list or task list to initiate a refresh. This will:
Upload any completed instances
Download any new or changed surveys / forms
Download any new or changed tasks
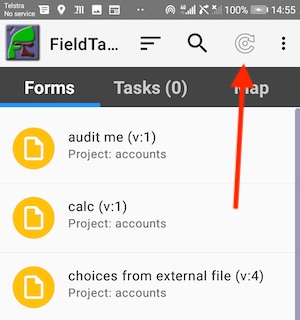
Refresh Button
In the tasks tab, the icons of completed instances will change from purple to green when they have been sent to the server. Any instances with a green icon will be removed. If an instance cannot be sent because it's survey is blocked or has been deleted, then it will stay on the device and will be shown with a grey icon.
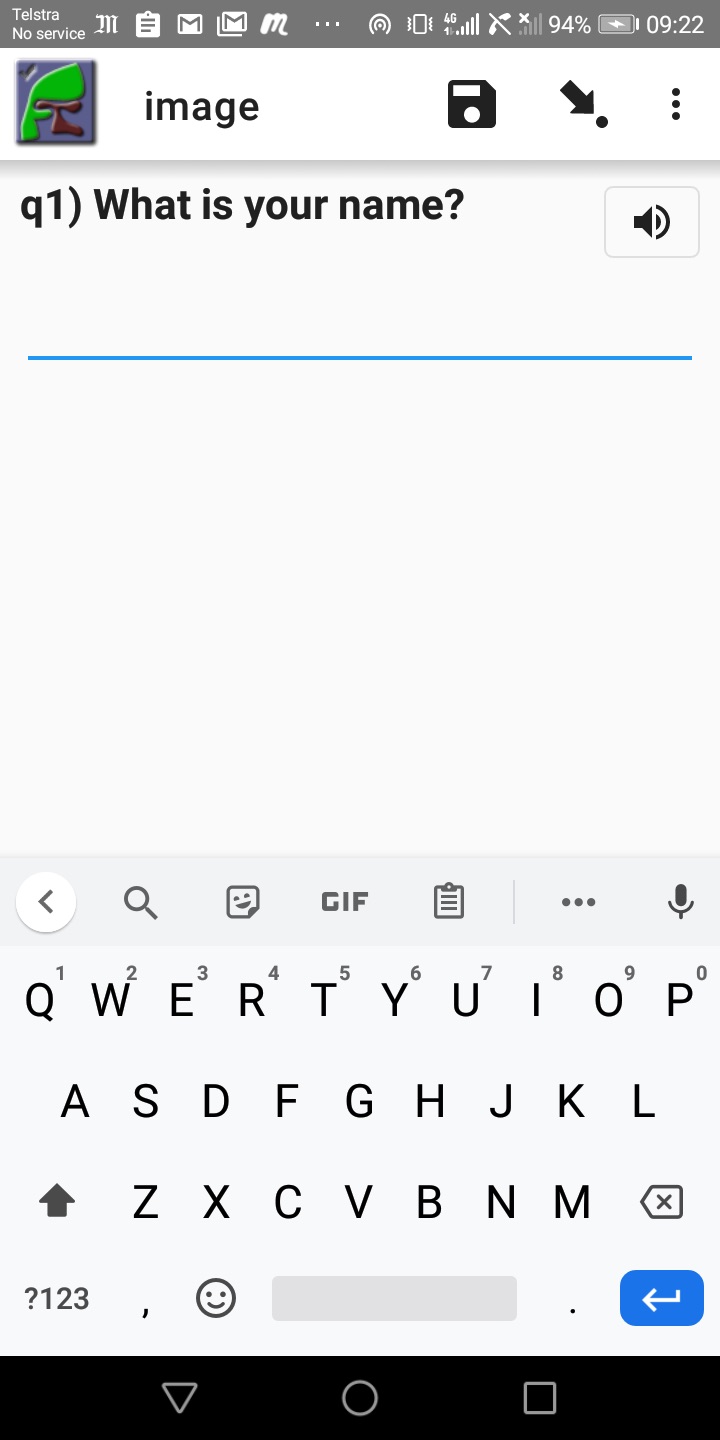
Starting a Survey Form
Select the Forms tab, as shown circled below, and then tap the survey that you want to complete.

Launch Survey
Finding the Survey
If you have a lot of forms on your phone then it may be hard to find the one you want to open. However you can use Search or Order by to make the form easier to find. These buttons are circled in the image below.
Search. When you type some characters into the search bar, only those forms that contain that sequence of characters in their name are shown.

Find a survey form
Order By. You can order survey forms by:
Name Ascending
Name Descending
Order Downloaded Ascending
Order Downloaded Descending
Project Name Ascending
Project Name Descending
Task instances can be ordered by:
Name Ascending
Name Descending
Order Downloaded Ascending
Order Downloaded Descending
Status, finalised first
Status, not finalized first
Note
It is good practice to only have the single survey that an enumerator needs to complete on the phone. The fewer surveys that they have to choose from the less likely the wrong survey will be completed.
Adding notes
You can add free form notes to any question by selecting Menu and then Add comment while completing a survey. Although the question name is included in the note automatically, a single note for the entire survey is actually created. All the notes you add for each question get combined. They can then be seen in the survey notes column when viewing results.
Changing the Language
You can change the survey language displayed by selecting Menu and then Change language while completing a survey.
FieldTask Settings
There are many settings that you can configure on the device using Menu and General settings. Many of these can also be specified on the server (Mobile App Options). If specified on the server the settings will override those on the phone for all devices.
Playing Media Questions
If an audio or video file is added to a question (Questions with Media) then an icon will be shown that the user can select to play the media.
Playing Media
If the media is set to auto play then the text of the question will show as blue and the icon will be grayed out while the file is playing.
Task Actions
Each task on the tasks tab includes a menu at the right which you can select to show a list of choices for that task.
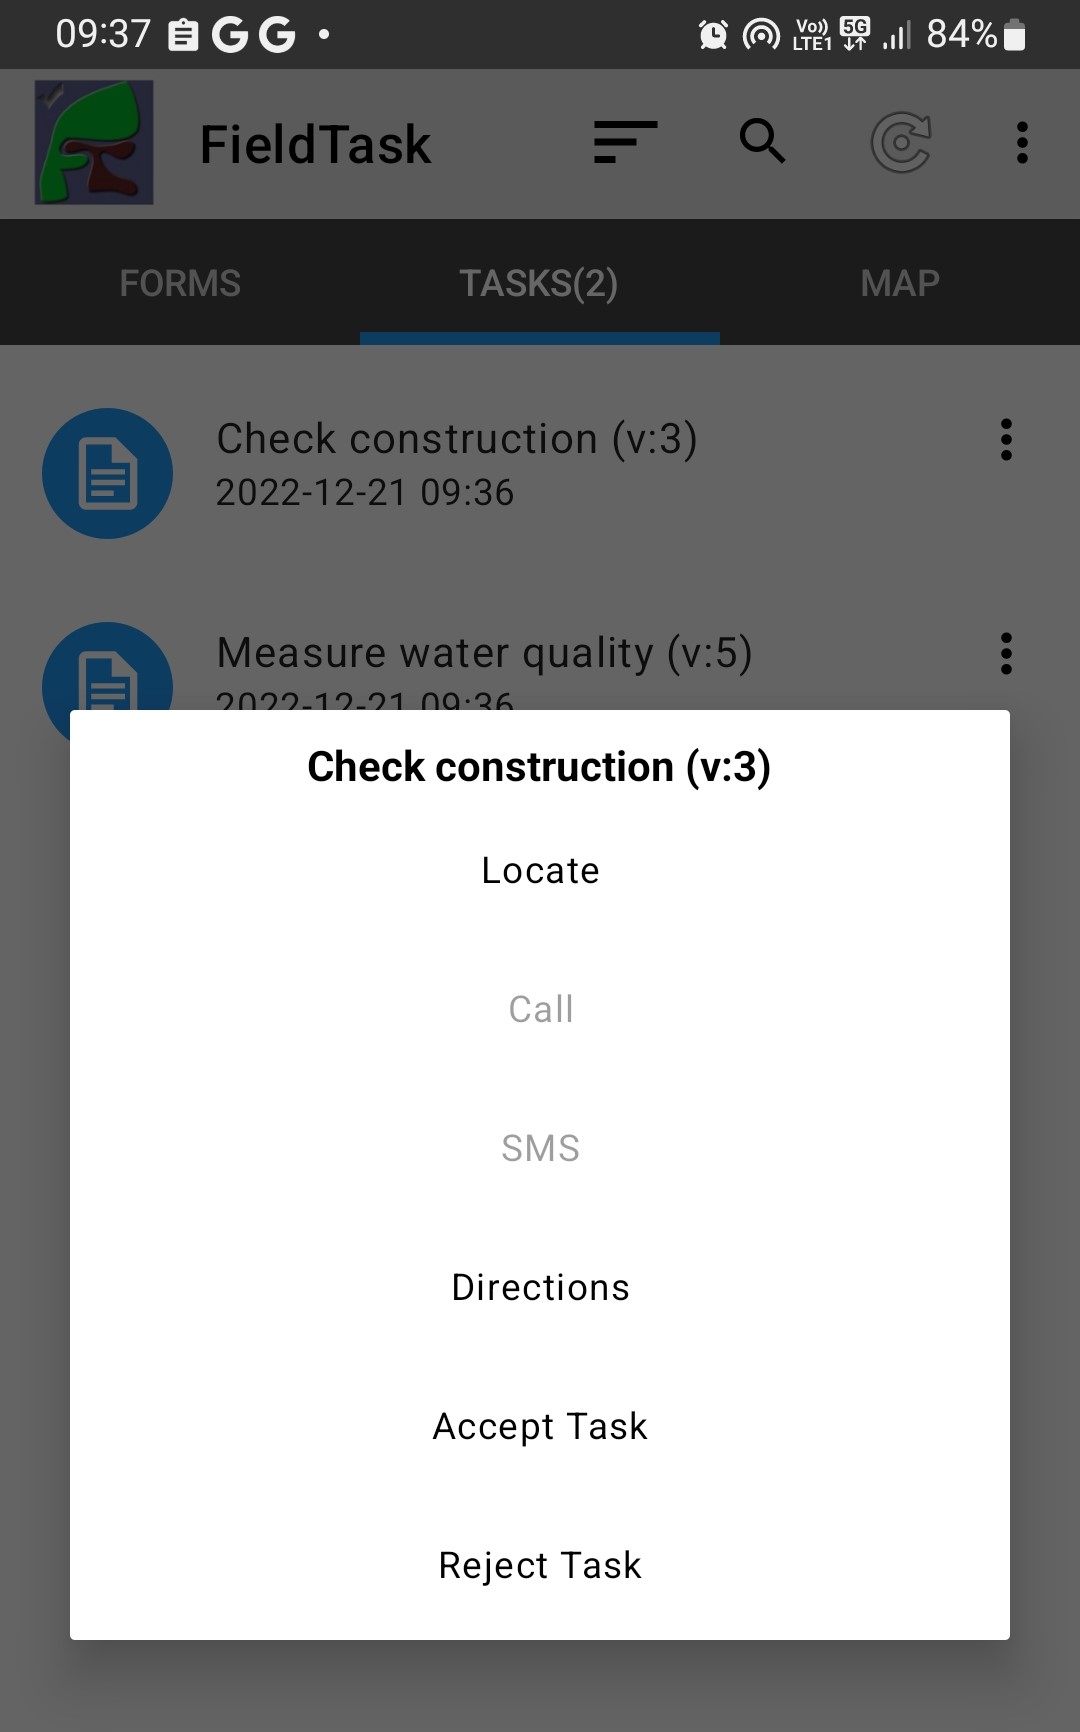
Selecting an action for a task
Locate
This choice will be enabled if the task has been specified to be completed at a location. Selecting it will show the location of the task on the map tab.
Call
If a contact number is available for the task, this opens the phone dialer.
Directions
This choice will be enabled if the task has been specified to be completed at a location with coordinates. Selecting it will open Google maps in directions mode with the destination set to the location of the task.
Accept Task
If a task has been created with the Self Assign checkbox set, then a user can accept that task here.
Reject Task
An assigned task can be rejected by selecting this choice. A reason for rejecting the task must be specified. For a case the case will be unassigned.